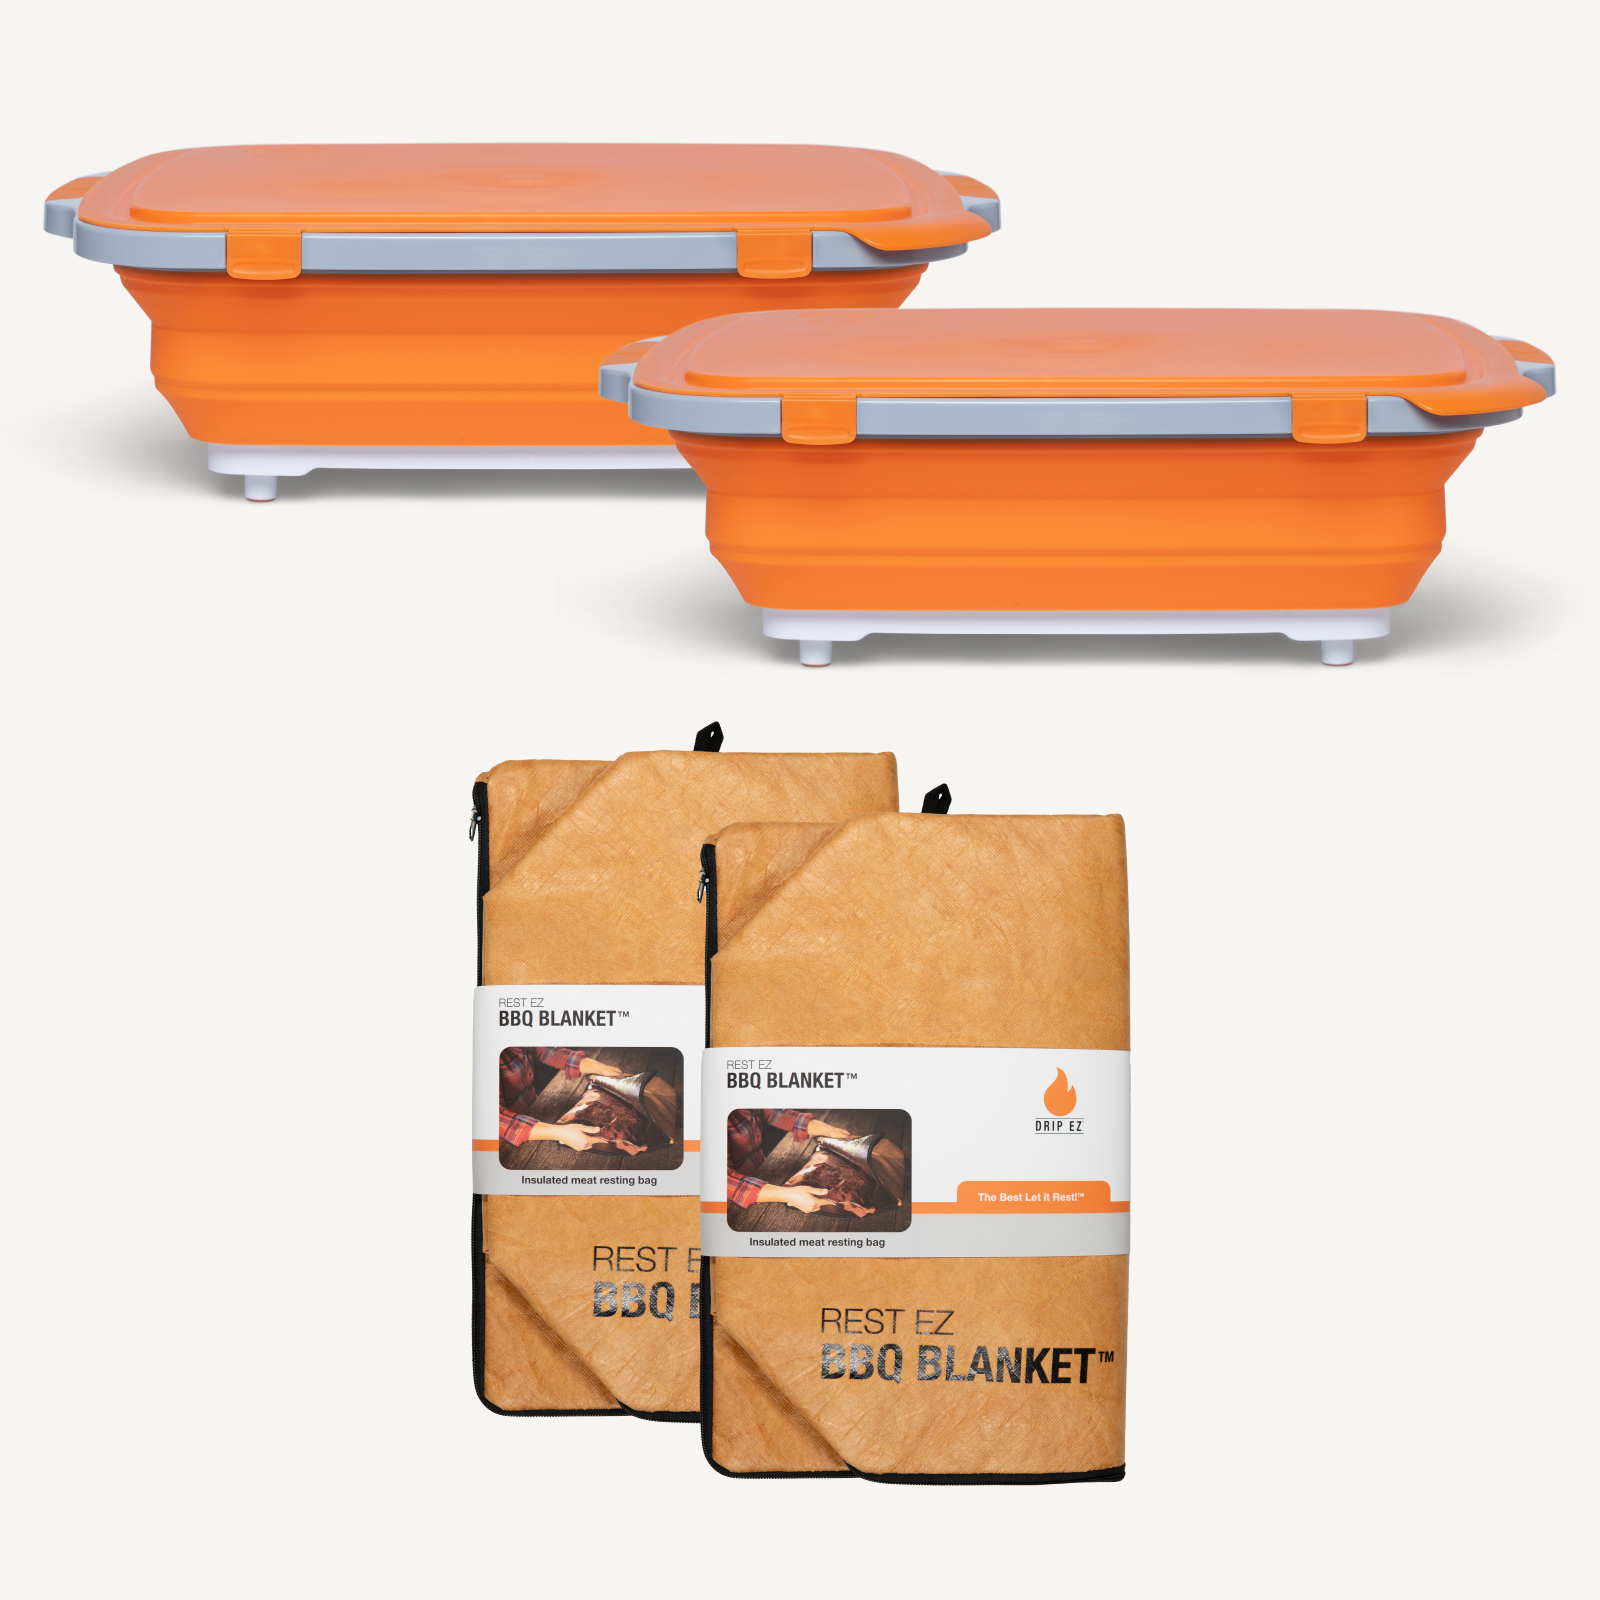
The Serve Up Blog
The Serve Up Blog

6 Smoker Thanksgiving Sides That Steal the Show
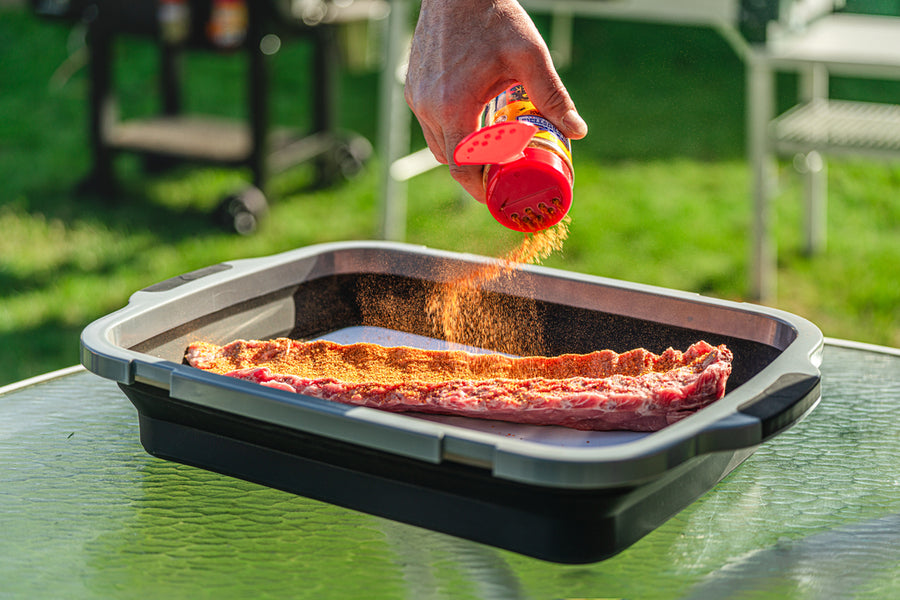
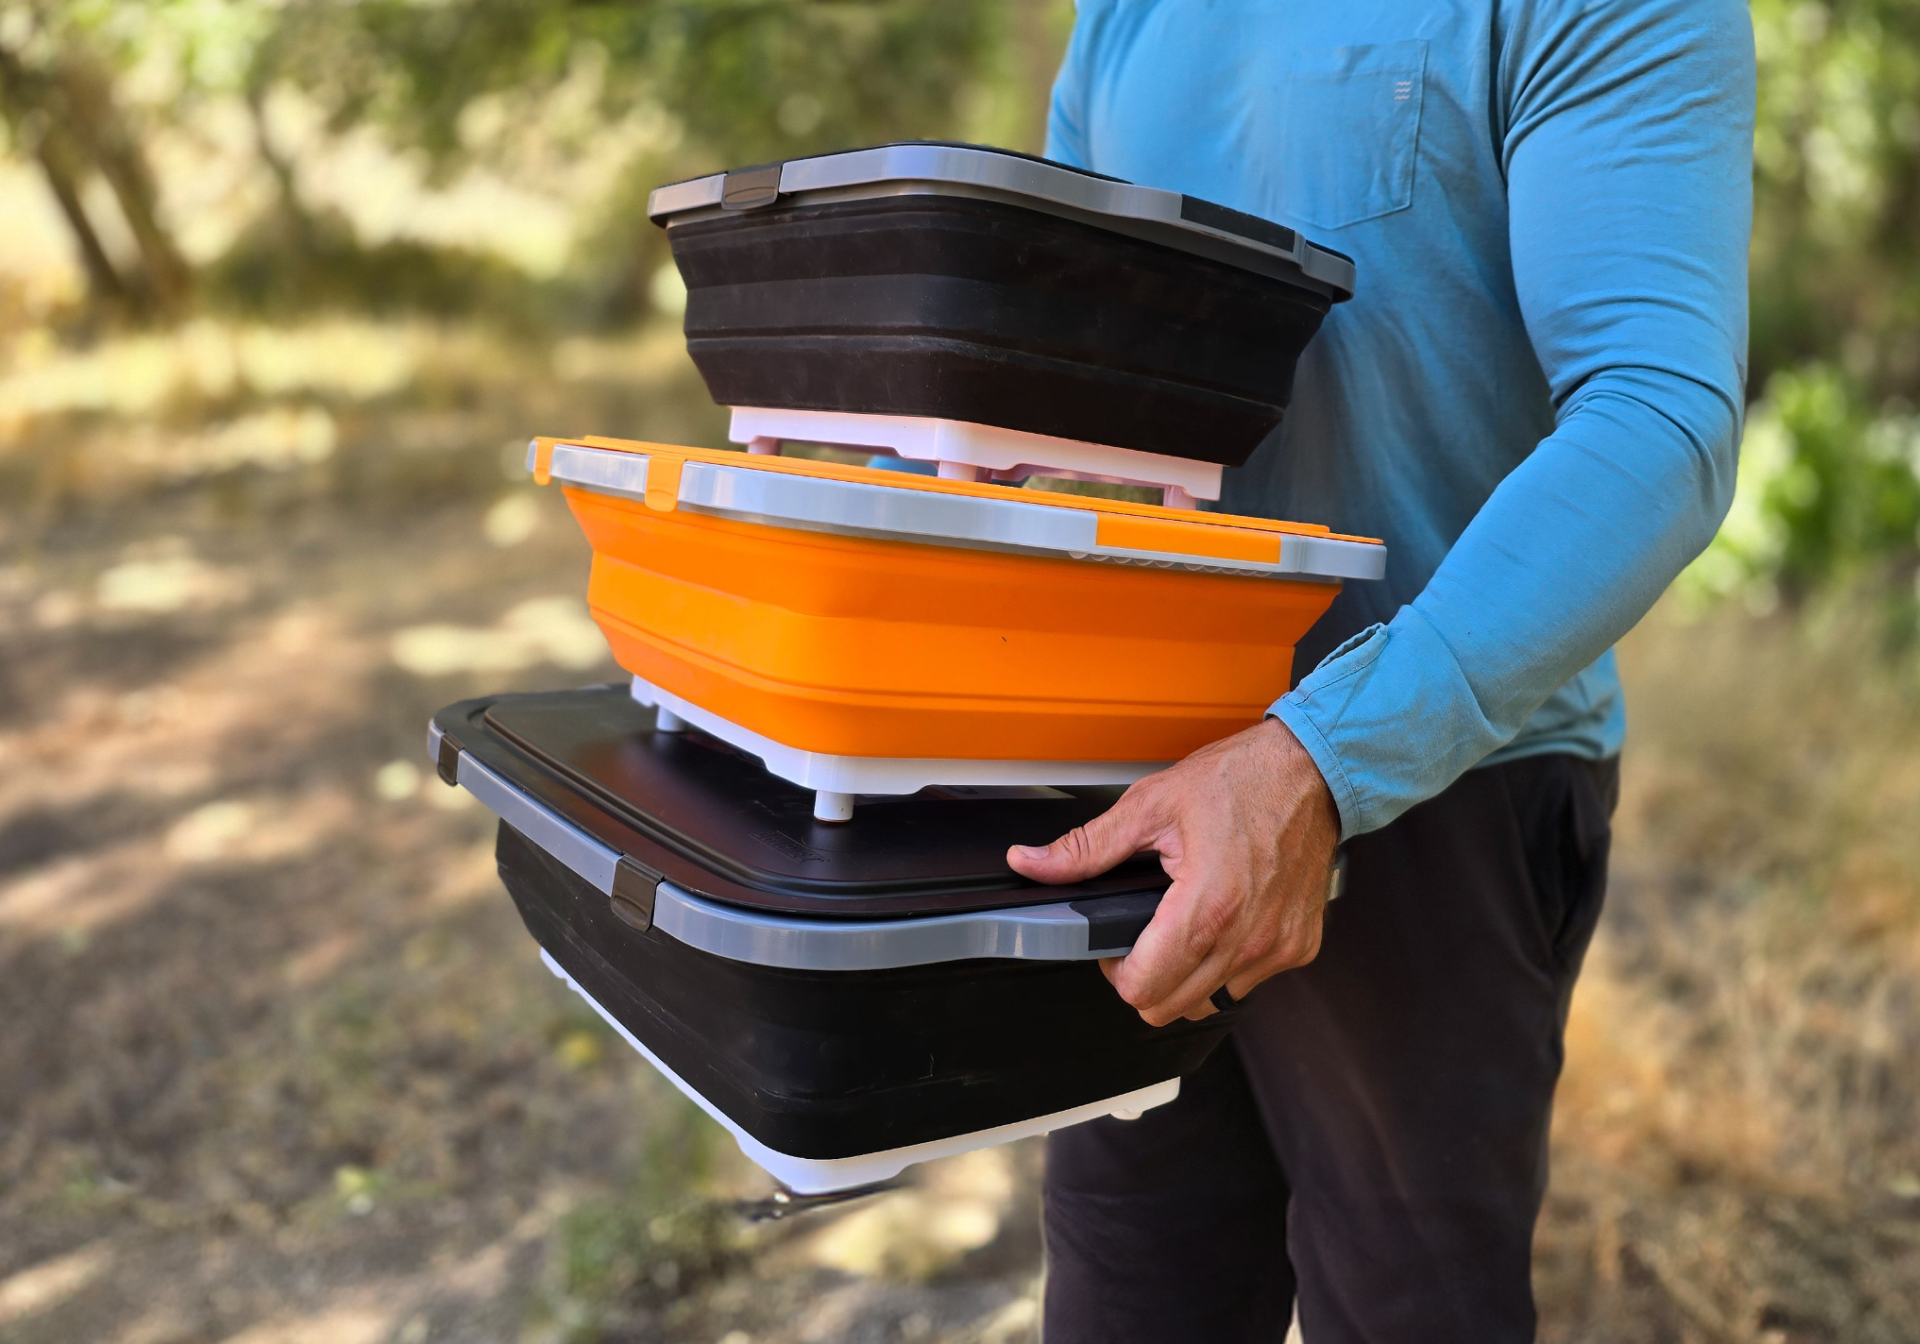
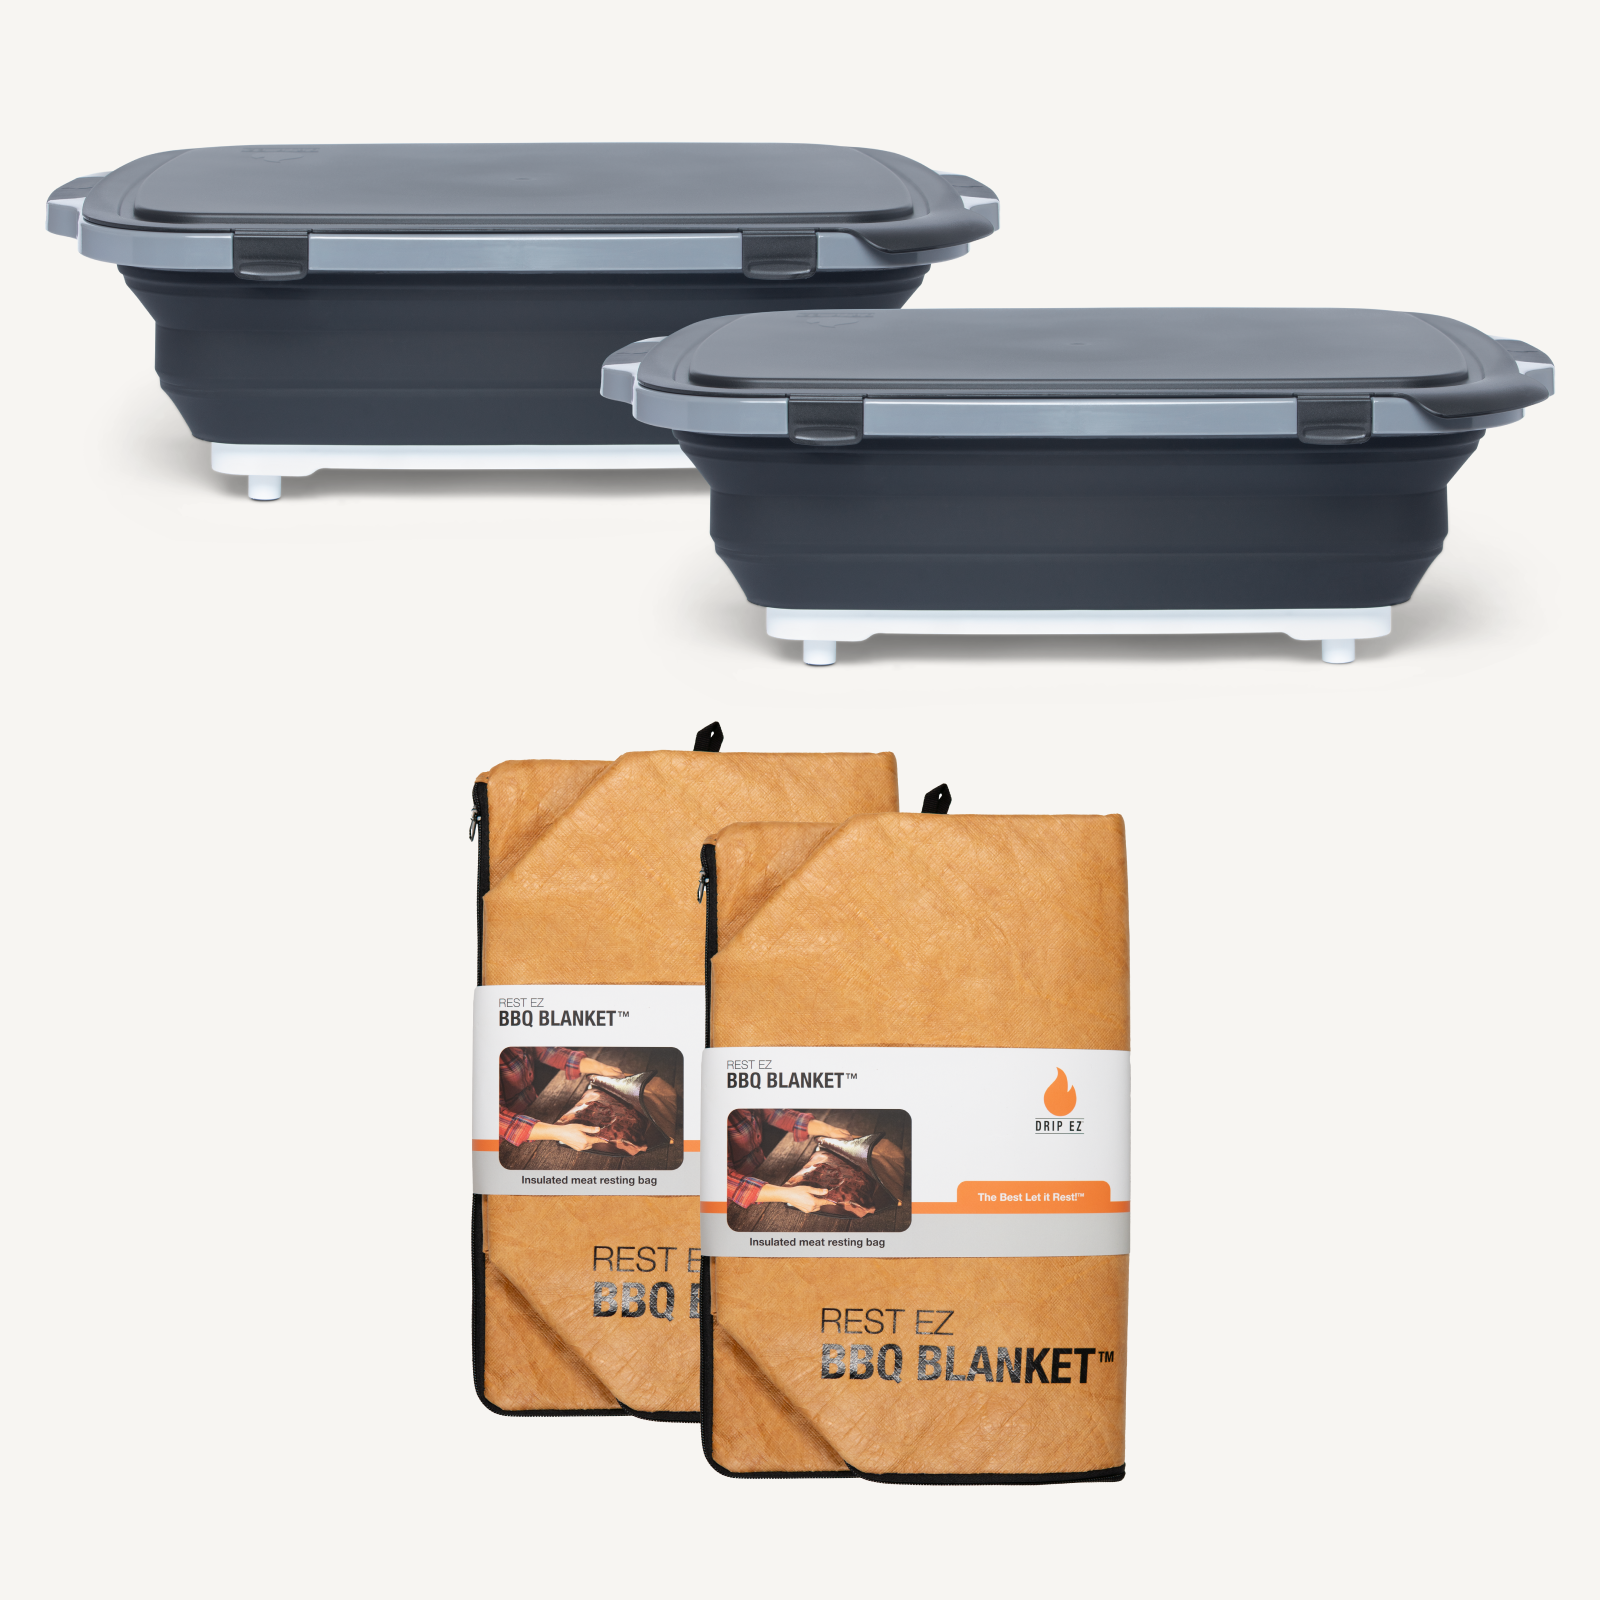
Every Thanksgiving, there’s a moment around 2 p.m. when the kitchen turns into an air traffic control tower. The turkey needs the oven. The stuffing needs the oven. Grandma’s sweet potato casserole needs the oven, and she’s been standing next to it for twenty minutes making that very clear. Here’s the move: take the sides outside. Your smoker is a second oven that happens to add flavor, and once the turkey comes off to rest, it’s sitting there hot with nothing to do. Mac and cheese picks up smoke like it was born for it. Stuffing gets a toasty, campfire edge. Cranberry sauce turns into the thing people ask you about on the drive home. Below you’ll find six smoker Thanksgiving sides that steal the show, the temps and times for each, and a game plan for getting all of them to the table hot at the same time. Can you make Thanksgiving sides on a smoker? Yes. Most Thanksgiving casseroles bake between 325°F and 375°F, which any smoker can hold. Run yours around 350°F, cook in disposable foil pans, and use a mild wood like apple, cherry, or pecan. Most sides take 30 to 60 minutes, which is just enough time to pick up a light smoke flavor without tasting like a campfire. That mild-wood part matters. Cheese, cream, butter, and bread soak up smoke much faster than a turkey does, so a heavy hickory or mesquite fire that tastes great on a brisket can make a pan of mac and cheese taste bitter. Keep the smoke light and clean, and let the sides take on just a hint of it. How long do smoked Thanksgiving sides take? Here’s every side in this post at a glance: Side Smoker temp Cook time Make ahead Smoked mac and cheese 350°F 45–60 min Assemble up to 1 day ahead Smoked cornbread stuffing 350°F 45–60 min (to 165°F) Bake and dry bread 1–2 days ahead Smoked sweet potato casserole 350°F 60–75 min (potatoes) + 35–45 min (casserole) Smoke and mash potatoes up to 2 days ahead Smoked green bean casserole 350°F 35 min Make sauce 1 day ahead Maple bacon Brussels sprouts 400°F 25–30 min Trim sprouts 1 day ahead Smoked cranberry sauce 325–350°F 45–60 min Up to 5 days ahead Those times assume a preheated smoker that’s holding steady. Every cooker runs a little different, so trust the visual cues in each recipe over the clock. The Six Smoker Sides 1. Smoked Mac and Cheese If you only smoke one side this year, make it this one. The smoke catches on the golden, crispy top layer and sinks into the sauce just enough that people stop mid-bite to ask what’s different. Serves 10 to 12. Ingredients 1 lb elbow macaroni or cavatappi 4 tbsp butter ¼ cup all-purpose flour 3 cups whole milk 1 cup heavy cream 8 oz sharp cheddar, shredded 8 oz gouda, shredded 4 oz cream cheese 1 tsp dry mustard and 1 tsp garlic powder Salt and pepper, to taste For the topping: 1 cup panko, 2 tbsp melted butter, ½ cup shredded cheddar How to make it Fire up the smoker. Preheat to 350°F with apple or cherry wood. Undercook the pasta. Boil it 2 minutes short of the package directions. It finishes cooking in the sauce on the smoker, and fully cooked pasta turns mushy. Make the sauce. Melt the butter, whisk in the flour, and cook for a minute. Slowly whisk in the milk and cream and simmer until it coats a spoon. Off the heat, stir in the cheeses, cream cheese, dry mustard, and garlic powder, then season. Mix it in the tub. Toss the pasta and sauce together in an Original or XL Prep Tub. There’s room to stir without sauce going over the side, then pour it into a greased foil pan. Top and smoke. Mix the panko and melted butter, scatter it over the top with the extra cheddar, and smoke uncovered for 45 to 60 minutes, until it’s bubbling at the edges and golden on top. Rest it. Give it 10 minutes before serving so the sauce sets up. Pro tip: Shred your own cheese. The bagged stuff is coated in starch to keep it from clumping, and that starch makes the sauce grainy. 2. Smoked Cornbread Stuffing Cornbread brings sweetness, sourdough brings structure, and sausage brings everything else. On the smoker, the top gets crisp and toasty while the middle stays soft. Serves 10 to 12. Ingredients 8 cups cubed day-old cornbread (about one 9x13 pan) 4 cups cubed sourdough or French bread, dried 1 lb breakfast sausage ½ cup butter 1 large onion and 3 celery stalks, diced 3 cloves garlic, minced 2 tbsp fresh sage and 1 tbsp fresh thyme, chopped (or 2 tsp and 1 tsp dried) 3 cups chicken or turkey stock 2 eggs, beaten Salt and pepper, to taste How to make it Dry the bread. Spread the cubes out and leave them uncovered overnight, or toast them in a 250°F oven for about 30 minutes. Dry bread soaks up stock instead of turning to paste. Cook the base. Brown the sausage and set it aside. In the same pan, melt the butter and cook the onion and celery until soft, then add the garlic and herbs for one more minute. Toss it in the tub. Combine the bread, sausage, and vegetables in an XL Prep Tub. Whisk the stock and eggs together, pour over, and toss until everything is moistened but not soggy. Smoke it. Transfer to a greased foil pan and cover with foil. Smoke at 350°F for 30 minutes covered, then 15 to 30 minutes uncovered, until the top is crisp and the center reads 165°F. Why not stuff the bird? A smoked turkey spends its first stretch at a low temperature, and stuffing packed in the cavity can sit in the danger zone for too long before it reaches a safe 165°F. Cook your stuffing in a pan instead. You’ll get more crispy edges anyway, which is the best part. 3. Smoked Sweet Potato Casserole Smoking the sweet potatoes whole before mashing them gives this casserole a deep, roasty flavor you can’t get from boiling. The pecan crumble on top is non-negotiable. Serves 10 to 12. Ingredients 4 lbs sweet potatoes (about 5 large) ½ cup butter, melted ½ cup brown sugar ½ cup milk 2 eggs 1 tsp vanilla, 1 tsp cinnamon, ½ tsp salt For the topping: 1 cup chopped pecans, ½ cup brown sugar, ⅓ cup flour, 4 tbsp cold butter Mini marshmallows (optional, but we won’t judge either way) How to make it Smoke the potatoes. Prick them with a fork and smoke them whole at 350°F for 60 to 75 minutes, until completely soft. You can do this up to two days ahead. Mash. Scoop the flesh into a Prep Tub and mash with the butter, brown sugar, milk, eggs, vanilla, cinnamon, and salt until smooth. Spread it into a greased foil pan. Make the crumble. Rub the pecans, brown sugar, flour, and cold butter together with your fingers until it looks like wet sand, then scatter it over the top. Smoke again. Cook at 350°F for 35 to 45 minutes, until the center is set and the topping is browned. If you’re adding marshmallows, put them on for the last 10 minutes. 4. Smoked Green Bean Casserole This is the classic, rebuilt from scratch with fresh beans and a real mushroom cream sauce. It holds up to the smoker much better than the canned version, and it still gets the crispy onions on top. Serves 8 to 10. Ingredients 2 lbs fresh green beans, trimmed and halved 8 oz cremini mushrooms, sliced 3 tbsp butter 2 cloves garlic, minced 3 tbsp flour 1 cup chicken stock and 1 cup heavy cream ½ cup grated parmesan Salt and pepper, to taste 1½ cups crispy fried onions, divided How to make it Blanch the beans. Boil for 4 minutes, then plunge into ice water and pat dry. Make the sauce. Brown the mushrooms in butter, add the garlic, then stir in the flour. Whisk in the stock and cream, simmer until thick, and stir in the parmesan. Combine. Toss the beans, sauce, and half the fried onions together in a Prep Tub, then transfer to a foil pan. Smoke. Cook at 350°F for 25 minutes, top with the rest of the onions, and give it 10 more minutes until bubbling. 5. Maple Bacon Brussels Sprouts Every Thanksgiving table needs one thing that isn’t beige. These get charred edges, crispy bacon, and a sweet-tangy glaze that converts even the Brussels sprouts skeptics. Serves 8. Ingredients 2 lbs Brussels sprouts, trimmed and halved 6 slices thick-cut bacon, chopped 2 tbsp olive oil Salt and pepper, to taste 2 tbsp maple syrup and 1 tbsp balsamic vinegar How to make it Season in the tub. Add the sprouts, olive oil, salt, and pepper to a Prep Tub, snap on the locking lid, and shake. Every sprout gets coated, and nothing ends up on the floor. Spread them out. Arrange in a single layer in a foil pan or grill basket and scatter the bacon over the top. Cook hot. Cook at 400°F for 25 to 30 minutes, stirring halfway, until the edges are deeply browned and the bacon is crisp. Glaze. Whisk the maple syrup and balsamic together and toss with the sprouts right before serving. Timing tip: These want more heat than the casseroles, so cook them last, after you bump the smoker up, or on the grill if you have one going. 6. Smoked Cranberry Sauce This is the easiest recipe here, and the one you can knock out days before Thanksgiving. The smoke rounds out the tartness and makes it taste like it took much more effort than it did. Makes about 3 cups. Ingredients 24 oz fresh cranberries (2 bags) 1 cup sugar ¾ cup orange juice and the zest of 1 orange 1 cinnamon stick Pinch of salt A splash of bourbon (optional) How to make it Mix it in the pan. Stir everything except the bourbon together in a foil pan. Smoke it. Cook uncovered at 325°F to 350°F for 45 to 60 minutes, stirring every 15 minutes, until most of the berries have burst and the liquid has thickened. Finish. Pull out the cinnamon stick and stir in the bourbon if you’re using it. It’ll thicken more as it cools. Store it. Keep it in a lidded Secondz® Container in the fridge for up to 5 days. How do you smoke sides and a turkey at the same time? Use the turkey’s rest. A smoked turkey needs 30 to 45 minutes to rest after it comes off, and that’s your window. Wrap the bird and get it into a Rest EZ® BBQ Blanket, bump the smoker to 350°F, and slide the casseroles on while the turkey holds. Start longer-cooking sides during the turkey’s final high-heat stretch. If you followed our turkey brining guide, you’re already smoking at 225°F, then bumping the heat to 325°F to 350°F to crisp the skin. That second phase is right where the sides want to be. Here’s how the whole week shakes out: When What to do Up to 5 days before Make the cranberry sauce and store it in a Secondz® Container. 2 days before Smoke and mash the sweet potatoes. Bake the cornbread and dry the bread cubes. 1 day before Assemble the mac and cheese, cover, and refrigerate. Make the green bean sauce and trim the Brussels sprouts. Prep components in Secondz® containers so your fridge doesn’t turn into a game of Jenga. Thanksgiving morning Assemble the stuffing and green bean casserole. Turkey’s high-heat finish Stuffing and sweet potato casserole go on, if you have rack space. Turkey comes off to rest Mac and cheese and green beans go on. Brussels sprouts go last, once you bump the heat. Cold pans take longer. A casserole straight from the fridge can add 15 to 20 minutes to the cook time. Pull assembled pans out about 30 minutes before they go on the smoker, and plan accordingly. How do you keep Thanksgiving sides warm? Keep them above 140°F. Cooked food shouldn’t sit between 40°F and 140°F for more than two hours total, and Thanksgiving dinner is notorious for running late. Cover finished pans tightly with foil and hold them on the smoker at its lowest setting, around 170°F to 200°F, until everyone’s seated. A probe thermometer takes the guesswork out of it. The turkey gets the blanket. Your sides get the smoker. Everything comes out hot at the same time, and you get to sit down for once. (We cover the danger zone in more detail in our tailgate checklist, and the same rules apply at the holiday table.) Pro tips for smoking side dishes Go easy on the wood. Apple, cherry, and pecan play nicely with dairy and bread. Save the hickory for the meat, and skip mesquite entirely for sides. Use disposable foil pans. Glass and ceramic can crack with sudden temperature swings, and smoke leaves a residue that’s tough to scrub off your good dishes. Prep in the tub, cook in the pan. Mix, toss, and season in your Prep Tubs, then carry everything out to the smoker in one trip. The foil pans go on the grate; the tubs stay in the kitchen for the next round of prep. Leave most sides uncovered. Smoke can’t reach food under foil, and the tops won’t brown. The exception is stuffing, which stays covered for the first half so it doesn’t dry out. Mind the drippings. If your turkey is still on, put the sides on a rack above it or off to the side, not underneath, so turkey drippings don’t land in the green beans. Serve It Up Line the pans up family-style, carve the turkey right on your Prep Tub’s built-in cutting board, and let the juice stay in the tub instead of running across the counter. Then watch what happens: the turkey gets the compliments, but the smoked mac and cheese is the first pan to run empty. As for leftovers, pack them into Secondz® Containers and reheat covered at 350°F until hot all the way through. Smoked sides might be even better the next day, especially piled onto a turkey sandwich. Smoked Thanksgiving Sides FAQ What sides can you cook on a smoker? Almost any side that bakes in the oven between 325°F and 375°F: mac and cheese, stuffing, sweet potato casserole, green bean casserole, baked beans, cornbread, roasted vegetables, and even cranberry sauce. What temperature should I smoke side dishes at? 350°F works for most casseroles. Bump it to 400°F for roasted vegetables like Brussels sprouts that you want charred and crispy. What wood is best for smoking side dishes? Mild fruit and nut woods like apple, cherry, and pecan. Dairy and bread absorb smoke quickly, so strong woods like mesquite can make sides taste bitter. Can I make smoked sides ahead of time? Yes. Cranberry sauce keeps for up to 5 days, and most casseroles can be assembled the day before and refrigerated. To reheat a fully cooked side, cover it and warm at 350°F until it reaches 165°F in the center. Should I cook stuffing inside a smoked turkey? No. A smoked turkey cooks at a low temperature for a long time, and stuffing inside the cavity can sit in the danger zone too long. Cook it in a pan to 165°F. Do I need to cover sides on the smoker? Most sides should go uncovered so they absorb smoke and brown on top. Cover stuffing for the first half of the cook, and tent anything with foil if the top is browning too fast. In Summary: Smoker Thanksgiving Sides Your smoker is the second oven you didn’t know you had. Run it at 350°F with a mild wood like apple, cherry, or pecan, cook in disposable foil pans, and most sides are done in 30 to 60 minutes. Mac and cheese, cornbread stuffing, sweet potato casserole, and green bean casserole all bake beautifully at that temperature, Brussels sprouts want a hotter 400°F, and cranberry sauce can be made days in advance. The real trick is timing. Use the turkey’s 30 to 45 minute rest to cook your sides, wrap the bird in a BBQ blanket to hold its heat, and keep everything above 140°F until it hits the table. Do as much prep as you can the day before, cook the stuffing in a pan instead of the bird, and you’ll walk into Thursday with a free oven and a calm kitchen. Make one, or make all six, then tag @bbq_dripez so we can see your spread. Shop Prep Tubs and Secondz® →
Read more
How to Smoke a Turkey for Thanksgiving: Timing and Temp Guide
For those of you responsible for the MVP of Thanksgiving dinner, the turkey, there's a particular kind of anxiety that settles in around 10 p.m. the night before the big day. What if it's dry? What if everyone is really polite about it? What if you end up having to order takeout? Let us assure you: if you stick with us, we'll never lead you astray. Smoke the turkey, friend. You won't regret it. A smoked turkey frees up oven space for pies and the four casseroles that all need different temperatures, tastes better than a roasted one, and gets you out of the house (which, depending on your family dynamics, might be a good thing?). If you've never smoked a turkey before, start here. We'll walk through all of it, from the bird in the freezer to the carving board. How to prep your turkey It's not as complicated as you think; you just have to think a few days in advance. Step 1: Thaw for a few days A frozen turkey needs about 24 hours in the refrigerator for every 4 to 5 pounds. A 14-pound bird needs roughly three full days. Put it on a tray on the bottom shelf so it doesn't drip on anything. If you've run out of time, you can thaw it in cold water instead: keep the bird in its wrapper, submerge it in cold tap water, and change the water every 30 minutes. That takes about 30 minutes per pound, so a 14-pound bird is around seven hours of babysitting. Never thaw a turkey on the counter. The outside sits in the bacteria danger zone for hours while the middle is still frozen. Once it's thawed, reach into the cavity (the hollow space inside the bird) and pull out the bag of giblets and the neck. They're often tucked in at both ends, so check both. Then pat the whole bird dry with paper towels, inside and out. Don't rinse it in the sink. Washing raw poultry splashes bacteria around your kitchen and doesn't accomplish anything. Step 2: Spatchcock it, or leave it whole Spatchcocking means removing the backbone so the bird can lay flat. It sounds fancy, but it only takes about five minutes. To spatchcock it, place the turkey breast-side down on a cutting board. Using sturdy kitchen shears, cut up along one side of the backbone from tail to neck, then cut up the other side and lift the backbone out. (Pro tip: save it for stock!) Flip the bird over, breast side up, and press down hard on the breastbone with both palms until you feel it crack. Why bother? A flat bird cooks faster and far more evenly. With a whole turkey, the breast finishes well before the thighs do, so by the time the dark meat is right, the white meat has dried out. Flattening the bird brings them much closer together. Whole bird Spatchcocked Time at 250°F 25 to 30 min/lb About 16 min/lb Evenness Breast finishes well before thigh Much closer together Skin Good Better, more surface exposed Presentation The classic Flat, less dramatic Our honest take: Spatchcock your turkey if you care most about how it tastes. Keep it whole if you want to carry a picture-perfect bird to the table. Both work, and the rest of this guide applies either way. Step 3: Brine it Brining means salting the bird ahead of time so it holds onto its moisture while it cooks. It's the single highest-return thing you can do to have a flavorful turkey, and it takes about fifteen minutes of actual work. You can brine your turkey wet or dry. A wet brine submerges the bird in salted water for 12 to 24 hours. A dry brine rubs salt directly onto the bird and sits for 24 to 72 hours. Wet brine is your best insurance against a dry bird, while dry brine gets you crispier skin, a deeper turkey flavor, and takes up almost none of your refrigerator. Either way, set up in an XL Prep Tub. For a wet brine, a heavy-duty brining bag inside the tub keeps the liquid contained, and the locking lid means you can move the whole thing to the fridge without redecorating your kitchen. For a dry brine, the bird sits uncovered in the tub. We went deep on ratios and timing in our full turkey brining guide, including the one rule people miss: if your turkey is labeled kosher, self-basting or enhanced, it's already been brined, and doing it again will make it inedibly salty. Check the label. One more thing that matters for skin: whichever brine you use, let the bird sit uncovered in the fridge for the last 12 to 24 hours. Dry skin is crispy skin! Step 4: Season it Most guides tell you to season a turkey without telling you that some seasoning gets into the meat and some just sits on top. It’s worth knowing which is which! Salt, through the brine. Salt is the only seasoning that actually travels into the meat. Everything else sits on the surface, which is why brining does more for flavor than anything you add later. Compound butter under the skin. Compound butter is just softened butter mixed with herbs and seasonings. Slide your fingers between the skin and the breast meat to loosen it, then work the butter into that gap. As it melts, it bastes the breast from the inside for the entire cook. Rub on the outside. This flavors the skin and the drippings. DB's Original Rub works well here, or any poultry rub you like. Aromatics in the cavity. Tuck onion, lemon, garlic, and fresh herbs inside the bird. They'll perfume it while it cooks and make your yard smell incredible, but they won't move much flavor into the meat. Do it because you enjoy it. A simple compound butter: one stick of softened butter, two tablespoons of chopped fresh sage, thyme, rosemary, three or four cloves of minced garlic, the zest of a lemon, and black pepper. Mix it together, push about two-thirds under the skin, and spread the rest over the outside. Please note: skip the salt in your butter if you've already brined the bird. And go easy on sugary rubs, which will darken fast over five or six hours. How to smoke your turkey Your bird is prepped. Now the easy part, which is mostly waiting! Choose your wood Mild fruit woods are great. Cherry and apple are the standards, with maple a close third, and all of them complement poultry without overwhelming it. Oak and pecan work if you want something with a bit more body. Skip mesquite entirely, which will bulldoze a turkey over a multi-hour cook. Cherry does double duty here because it pulls the skin toward a deep golden mahogany. If you want a bird that looks like the magazine photo, that's your wood. A 70/30 blend of a mild wood with something slightly stronger, like apple with a little oak, gives you more backbone without tipping into bitter. Our wood pairing guide has the full breakdown. Set your smoker to 275°F Get the smoker steady at 275°F before the bird goes on, and set it up for indirect heat, meaning the turkey isn't sitting directly over the fire. A water pan helps too. It steadies the temperature and adds humidity, which keeps the breast from drying out. Then put the bird on, breast side up, and close the lid. You don't need to baste it, flip it, or open the lid to check on it. Every time you open the smoker, you lose heat and add time. How long does it take to smoke a turkey? Plan on 30 to 35 minutes per pound at 225°F, 25 to 30 minutes at 250°F, and 20 to 25 minutes at 275°F. A 14-pound bird runs about seven hours at 250°F. These are planning numbers, not promises, so always cook to temperature rather than the clock. Smoker temp Minutes per pound 14 lb bird Skin 225°F 30 to 35 min 7 to 8 hours Hardest to crisp 250°F 25 to 30 min 6 to 7 hours Better 275°F 20 to 25 min 4.5 to 6 hours Best of the three And by weight, if you'd rather work from the bird you already bought: Turkey weight At 225°F At 250°F At 275°F 10 lb 5 to 6 hours 4 to 5 hours 3.5 to 4 hours 12 lb 6 to 7 hours 5 to 6 hours 4 to 5 hours 14 lb 7 to 8 hours 6 to 7 hours 4.5 to 6 hours 16 lb 8 to 9.5 hours 6.5 to 8 hours 5.5 to 6.5 hours Please note: we'd steer you toward 275°F. Turkey isn't brisket, and poultry skin needs real heat to render and brown. The extra hours at 225°F add little smoke flavor and make crisp skin much harder to get. What temperature is a smoked turkey done? 165°F in the thickest part of the breast, which is the USDA minimum for all poultry. The thigh wants more, closer to 170 to 175°F, because dark meat has more connective tissue and eats better a little past the minimum. Use two thermometers, one in each, and pull when the breast hits its number. Where Target Breast, thickest part 165°F Thigh, away from bone 170 to 175°F Pull from the smoker 5 to 7°F early (carryover) Put the probe into the thickest part of the breast without touching bone, which reads hotter than the meat around it and will fool you into pulling early. Carryover cooking will carry the bird another 5 to 7 degrees while it rests, so pull it just shy. Every number here lives in our meat temperature chart if you want the rest of them. How to rest and carve your turkey Rest a whole turkey 30 to 45 minutes before you cut into it. Resting lets the muscle fibers relax so the juices stay in the meat instead of running out onto the board. A Rest EZ® BBQ Blanket holds the bird at temperature while you finish the sides, which also means a bird that finishes early isn't a problem. Our resting guide covers why this step matters more than people think. To carve: take the legs and thighs off first by pulling the leg away from the body and cutting through the joint. Then remove each breast half whole by cutting along one side of the breastbone and following the ribs down. Slice each breast half on the board, across the grain. Slicing the breast while it's still on the bird creates ragged pieces. Refrigerate leftovers within two hours, and smoked turkey keeps three to four days. Secondz® containers seal airtight and collapse flat, which matters on the one weekend your fridge is already full. Your Thanksgiving Day timeline Work backward from when you want to eat. Here's a 14-pound bird at 275°F, on the table at 4 p.m. When What 4 days before Move the turkey from the freezer to the fridge to thaw Two days before Spatchcock (optional) and start your dry brine Day before, evening Pat dry, leave uncovered in the fridge overnight 9:00 a.m. Pull the bird out, butter and season it, let it sit at room temp about an hour 9:30 a.m. Fire the smoker, get it steady at 275°F 10:00 a.m. Bird goes on 1:00 p.m. Start checking temps 3:00 p.m. Pull at 165°F breast, into the blanket 3:00 to 3:45 Rest while the oven handles everything else 3:45 p.m. Carve 4:00 p.m. Dinner Smoked turkey FAQ Can I smoke a frozen turkey? No. Thaw it completely first. A partially frozen bird cooks unevenly, spends too long in the temperature danger zone, and brine can't penetrate frozen meat. Plan on roughly 24 hours of refrigerator thawing for every 4 to 5 pounds, which means a 14-pound bird needs about three days. Why is my smoked turkey skin rubbery? Your smoker was too cool. Poultry skin needs real heat to render its fat and crisp, and 225°F doesn't get there. Run at 275°F, or finish the last 20 to 30 minutes at 325 to 350°F. Air-drying the bird uncovered in the fridge beforehand makes a significant difference too. How big a turkey can I smoke? Stay at 14 pounds or under. Larger birds take so long to come up through the danger zone that food safety gets harder to manage, and they cook less evenly. If you're feeding a crowd, smoke two smaller birds rather than one giant one. They finish faster and you get twice the skin. Do I have to spatchcock it? No. A whole bird smokes beautifully, it just takes longer and the breast finishes before the thighs. Spatchcocking is the better technical choice and a whole bird is the better centerpiece. Pick whichever matters more to you. Should I stuff a turkey I'm smoking? No. Stuffing has to reach 165°F itself, which means badly overcooking the bird to get there. Cook your stuffing separately and use the oven you just freed up. Should I put butter under the skin or just on top? Under the skin, mostly. Butter on the surface mainly helps the skin brown. Butter underneath melts into the breast and bastes it from the inside for the whole cook, which is where you actually need the help. Do I need a water pan? It helps. A water pan steadies your smoker temperature and adds humidity, which keeps the breast from drying out over a long cook. Just know that too much moisture works against crisp skin, so it's a tradeoff rather than a rule. In summary Thaw the bird early, allowing a full day in the fridge for every 4 to 5 pounds. Spatchcock it if you want faster, more even cooking, or keep it whole for the classic table moment. Brine it either way, then let it air-dry uncovered in the fridge for the last 12 to 24 hours. Get a compound butter under the skin, a rub on the outside, and aromatics in the cavity if you like. Use cherry or apple. Run your smoker at 275°F, which is 20 to 25 minutes per pound, so about five to six hours for a 14-pound bird. Pull at 165°F in the breast and 170 to 175°F in the thigh, a few degrees early to allow for carryover. Rest it 30 to 45 minutes while your oven handles everything else. Start earlier than you think you need to, cook to temperature instead of the clock, and enjoy an afternoon outside while the kitchen takes care of itself. Enjoy! Shop Turkey Day Essentials →

Jalapeño Candy Pork Belly Recipe
Sweet heat season is officially open. Drip EZ ambassador Stefanos Koukas (@viewsncues) took a slab of pork belly, hit it with his homemade spice mix, smoked it low and slow for five hours, then drowned it in sticky homemade jalapeño candy and cranked up the heat until every slice turned glossy and caramelized. “Every bite is juicy, packed with that crazy sweet heat, and it just melts in your mouth.” — Stefanos Koukas The best part? Most of this cook is hands-off. Season it, smoke it, rest it, and make the candy while the pork does its thing. Just don't bother it while it's resting. As Stefanos puts it: be quiet. It's resting. What Is Jalapeño Candy? Jalapeño candy (also called candied jalapeños or cowboy candy) is sliced jalapeños simmered in a sweet, tangy syrup until they soften and the syrup turns thick and glossy. Stefanos builds his with sugar, honey, apple cider vinegar, star anise, and cranberry jam, which gives it a deeper, slightly fruity finish that's made for rich, smoky pork belly. How Long Does It Take to Make Jalapeño Candy Pork Belly? Plan on about 6 to 7 hours of cook time, plus a few hours of marinating: 5 hours smoking at 230°F, a 30 to 60 minute rest, then about 1 hour over high heat in the jalapeño candy. The candy simmers while the pork rests, so it doesn't add any time. Here's the quick look: Step Temp Time Season & marinate Fridge 2–4 hours* Smoke (indirect) 230°F 5 hours Wrap & rest — 30–60 min* Simmer jalapeño candy (during rest) Low simmer 30 min Glaze & caramelize ~350°F* About 1 hour Total cook time 6–7 hours Ingredients For the Pork Belly 1 slab pork belly, skin removed (about 3–4 lbs) Yellow mustard, for the binder Stefanos's Spice Mix 2 tbsp smoked paprika 1 tbsp onion flakes 2 tsp smoked salt 2 tsp garlic powder 1 tsp dried thyme ¼ tsp ground cardamom Play around with the ratios to suit your taste! For the Jalapeño Candy 6–8 jalapeños*, sliced into rings ¾ cup sugar* ¼ cup honey* ½ cup apple cider vinegar* 2 whole star anise* ¼ cup cranberry jam* *Suggested starting amounts. Adjust to taste. Gear Drip EZ BBQ Prep Tub for seasoning, marinating, and slicing Wrap EZ™ Heavyweight Butcher Paper for wrapping Rest EZ® BBQ Blanket for the rest Drip EZ BBQ Grill Mitts for handling the hot stuff Smoker, saucepan, and a baking tray or disposable foil pan Why a Prep Tub? Mustard plus rub plus a slab of pork belly gets messy fast. Season it right in the tub, snap on the locking lid, and it marinates in the fridge without leaking onto the shelf below. When it's time to cook, the same tub carries it to the smoker, and after the rest, the built-in cutting board is ready for slicing. Not sure which size fits your slab? We broke that down here. How to Make Jalapeño Candy Pork Belly Season. Place the pork belly in your Drip EZ Prep Tub. Coat both sides with yellow mustard as a binder, then hit it all over with Stefanos's spice mix. Marinate. Snap on the lid and let it sit in the fridge for a few hours. (Wondering how long is too long? Here's our marinating guide.) Smoke. Set your smoker up for indirect heat at 230°F and smoke the pork belly for 5 hours, until it's tender and the bark has set. Wrap & rest. Pull a sheet of butcher paper off, wrap the pork belly up, and tuck it into your Rest EZ® BBQ Blanket to keep the juices locked in. Be quiet. It's resting. Make the jalapeño candy. While the pork rests, slice your jalapeños. In a saucepan, combine the sugar, honey, apple cider vinegar, star anise, and cranberry jam, then add the jalapeños. Simmer for 30 minutes, until the syrup is thick and glossy. Fish out the star anise. Slice & glaze. Unwrap the pork belly and slice it on the Prep Tub's cutting board. Lay the slices in a baking tray and pour all that jalapeño candy right over the top. Caramelize. Back on the grill over high heat (around 350°F*) for about another hour, until the glaze is bubbling, sticky, and perfectly caramelized. Serve. Grab your BBQ Grill Mitts, pull the tray, and spoon any extra candy over the top. Dig in. How Do You Know When It's Done? It's done when the jalapeño candy has cooked down into a sticky, glossy glaze that clings to every slice, the edges are dark amber, and the pork belly feels tender, not chewy, when you probe or bite it. If the candy is still thin and runny, give it more time on the grill. Pro Tips Control the heat. Scrape the seeds and ribs out of the jalapeños for a milder candy, or leave them in if you want more fire. Pour it warm. Jalapeño candy thickens as it cools, so time it to come off the stove right when the pork comes out of the blanket. Watch the last 15 minutes. Sugar goes from caramelized to burnt fast over high heat. Pull it when the edges are sticky and dark amber. Line the pan. Foil or a disposable foil pan makes cleanup a whole lot easier once that glaze sets. Make extra candy. Leftover jalapeño candy is great on burgers, sandwiches, or over cream cheese with crackers. Leftovers (if any): Store them in a Drip EZ Secondz® Container and reheat low so the glaze doesn't scorch. Serve It Up Pile the slices on a platter for game day, cut them into bites with toothpicks for an appetizer that disappears before kickoff, or serve them over rice with extra candied jalapeños on top. They're also killer stuffed into slider buns with a crunchy slaw. Planning a game day spread? Check out our ultimate tailgate checklist. Love pork belly and sweet heat? Try our Maple Bourbon Pork Belly Burnt Ends next. FAQ How long do you smoke pork belly at 230°F? About 5 hours using indirect heat, until it's tender and the bark has set. Then wrap and rest it before slicing and glazing. What's the difference between pork belly slices and pork belly burnt ends? Burnt ends are cubed before they hit the smoker, so every piece gets bark on all sides. Here, the pork belly smokes whole and gets sliced after the rest, which keeps it extra juicy before it's glazed. Want to try both? Here's our burnt ends recipe. Can I make jalapeño candy ahead of time? Yes. Make it a few days ahead and store it in a sealed jar in the fridge. It thickens as it cools, so warm it gently on the stove until it's pourable before glazing. Is jalapeño candy pork belly spicy? It's more sweet than fiery. Simmering the jalapeños in sugar, honey, and vinegar mellows them out. For more heat, leave the seeds in. For less, scrape them out. How long should I marinate pork belly? A few hours in the fridge is plenty for a mustard binder and dry rub. Always marinate in the fridge, never on the counter. Our marinating guide has the full breakdown. Shop the Recipe Make prep, cooking, and cleanup EZ with the gear behind this cook: Drip EZ BBQ Prep Tub: season, marinate, slice, and carry in one tub Rest EZ® BBQ Blanket: rest it right and keep the juices locked in Drip EZ BBQ Grill Mitts: for pulling that bubbling tray off the grill Hungry for more? Follow @viewsncues on Instagram for more recipes (like his spooky Jack-o-Peppers), and tag @bbq_dripez and @viewsncues when you make this one. Watch Stefanos Make It

Maple Bourbon Pork Belly Burnt Ends
If fall had a flavor, it'd taste a lot like these. Our ambassador Papa Dan's BBQ (@papadansbbq) took smoky pork belly, hit it with a Cajun garlic rub, and finished it in a maple bourbon glaze that turns every cube into a sticky, sweet, slightly spicy bite of candy. “Sticky, sweet, a touch of heat, and straight-up SMACKIN’!” — @papadansbbq The best part? This one is low-maintenance. Season, smoke, glaze, done. That makes it a perfect cook for game day, a fall get-together, or any BBQ where you'd rather hang with your crew than babysit the pit. What Are Pork Belly Burnt Ends? Pork belly burnt ends are cubes of pork belly that are seasoned, smoked low and slow until the fat renders, then tossed in a sweet sauce and cooked again until the glaze caramelizes. The result is a tender, rich, candy-like bite with a sticky bark. They're often called “meat candy” and are a crowd favorite at cookouts and tailgates. How Long Does It Take to Make Pork Belly Burnt Ends? Plan on about 4 to 5 hours of cook time at 250°F: 3 to 3.5 hours of smoking, then another 1 to 1.5 hours uncovered in the glaze. Add prep time for cubing and seasoning, plus a short rest before serving. Here's the quick look: Step Temp Time Prep (cube + season) — ~20 min Smoke 250°F 3–3.5 hours Glaze & finish (uncovered) 250°F 1–1.5 hours Total cook time 250°F 4–5 hours Ingredients For the Pork Belly Pork belly, skin removed, cut into bite-size cubes Vinegar-ban sed hot sauce, for the binder TFTI BBQ Spicy Garlicky Cajun Money Rub For the Maple Bourbon Glaze Blues Hog BBQ sauce Melinda's Hot Honey A splash of bourbon A GOOD splash of maple syrup 1 pad of butter Gear Drip EZ BBQ Prep Tub for cubing, seasoning, and easy cleanup Disposable foil pan Smoker Why a Prep Tub? Cubing pork belly gets messy fast. Do all your cutting on the Prep Tub's built-in cutting board, then pop the walls up and season right in the tub. Raw juices stay contained, your counter stays clean, and cleanup is one dishwasher-safe tub. How to Make Maple Bourbon Pork Belly Burnt Ends 1. Prep the Pork Belly Cut the pork belly into bite-size cubes. Go a little bigger than you think — they will shrink as the fat renders. Use your Drip EZ Prep Tub to keep prep and cleanup easy. 2. Season Coat the cubes with a vinegar-based hot sauce as a binder, then hit them on all sides with TFTI BBQ Spicy Garlicky Cajun Money Rub. 3. Smoke Smoke the cubes at 250°F for 3 to 3.5 hours, until the fat starts to render and a nice bark sets. 4. Make the Glaze In a saucepan, combine Blues Hog BBQ sauce, Melinda's Hot Honey, a splash of bourbon, and a good splash of maple syrup. Simmer until thickened, then remove from heat and stir in a pad of butter for a smooth, velvety finish. 5. Glaze & Finish Toss the smoked pork belly in a foil pan with the glaze. Return to the smoker uncovered at 250°F for another 1 to 1.5 hours, until the glaze is sticky and set. 6. Rest & Serve Let them rest, plate them up, and pour any extra sauce right over the top. How Do You Know When Pork Belly Burnt Ends Are Done? They're done when the glaze has thickened into a sticky, glossy coating that clings to each cube and the pork belly feels tender, not chewy, when you bite or probe it. If the sauce is still thin and runny, give them more time uncovered on the smoker to tighten up. Pro Tips Cut big. Pork belly loses a lot of size as the fat renders, so oversize your cubes. Butter goes in off the heat. Stirring it in after you pull the glaze keeps it silky instead of greasy. Leave the pan uncovered. That's how the glaze reduces and turns sticky instead of steaming. Want more heat? Add an extra drizzle of hot honey right before serving. Leftovers (if any): Store them in a Drip EZ Secondz® Container and reheat low and slow so the glaze doesn't scorch. Serve It Up These are made for sharing. Pile them on a platter with toothpicks for game day, serve them over mac and cheese or in sliders, or set them out as the appetizer that disappears before the main event. Smoky pork belly, sweet maple bourbon glaze, Cajun garlic, and a little heat — as Dan puts it, a whole lotta smackin’. Don't expect them to last long. Check out our ultimate tailgate checklist here. FAQ How long do you smoke pork belly burnt ends at 250°F? About 3 to 3.5 hours to smoke, then 1 to 1.5 hours more uncovered in the glaze, for 4 to 5 hours total. Can I make the glaze without bourbon? Yes. The bourbon is just a splash for flavor, so you can leave it out or swap in a little apple juice. The maple syrup, hot honey, and BBQ sauce still bring plenty of sweet and heat. Why do pork belly cubes shrink? Pork belly is mostly fat. As it smokes, that fat renders out, so the cubes get noticeably smaller. That's why you cut them bigger than bite size to start. Can I make pork belly burnt ends ahead of time? You can smoke the cubes ahead, refrigerate them, then glaze and finish on the smoker the day you serve. The glaze is best fresh, when it's sticky and warm. Shop the Recipe Make prep, cooking, and cleanup EZ with the gear behind this cook: Drip EZ BBQ Prep Tub: cut, season, and transport in one tub Drip EZ Secondz® Container: for the leftovers (good luck) [SHOP THE PREP TUB →] Hungry for more? Follow @papadansbbq on Instagram for more smackin’ BBQ recipes, and tag @bbq_dripez when you make these. Watch Dan Make It

Jack-o-Peppers: Cheesy Burrito-Stuffed Halloween Peppers
Spooky on the outside, smoky on the inside Halloween food doesn't have to mean another bowl of candy. Drip EZ ambassador Stefanos Koukas (@viewsncues) turned bell peppers into little jack-o'-lanterns and packed them with a cheesy, smoky burrito filling. It's the kind of dinner that gets the kids to the table and still feeds the grown-ups right. The secret is in the details: charcoal-smoked corn, a punchy homemade spice mix, and plenty of melty cheddar. Carve, stuff, bake, and serve — no tricks required. Ingredients For the peppers Bell peppers (orange for the full jack-o'-lantern look), one per person Tomato sauce, a generous pour for the baking dish For the burrito stuffing Ground beef Pinto beans Charcoal-smoked corn Cream cheese Shredded cheddar (lots of it) Stefanos's spice mix 2 tbsp smoked paprika 1 tbsp cumin 2 tsp chipotle powder 1 tsp chili flakes 1 tsp nutmeg 2 tbsp salt Open question: the reel gives no quantities for the stuffing or pepper count, and no oven temperature. Confirm with Stefanos, or test in-house before publishing (a starting point: 1 lb beef, 1 can beans, 1 cup corn, 4 oz cream cheese, 1½ cups cheddar for 6 peppers at 375°F). How to make Jack-o-Peppers Smoke the corn. Grill the corn over charcoal until lightly charred, then cut it off the cob. Mix the spices. Combine the smoked paprika, cumin, chipotle, chili flakes, nutmeg and salt. Cook the beef. Brown the ground beef and season it with the spice mix to taste. Build the stuffing. In a Drip EZ Prep Tub, mix the beef, pinto beans, smoked corn, cream cheese and cheddar. Stir it all together right in the tub — no extra bowls to wash. Carve the faces. Cut the tops off the peppers, scoop out the seeds, and carve spooky little faces. Use the Prep Tub's built-in cutting board to keep the counter clean. Stuff your monsters. Pack each pepper with the burrito filling and set the tops back on. Bake. Pour a generous layer of tomato sauce into a baking tray, nestle in the peppers, and bake for about 45 minutes, until tender and melty. Serve. Top with extra cheddar and serve hot. Happy Halloween! The gear behind the mess-free prep Stefanos kept this one clean from carving to stuffing. Here's what he used. Drip EZ BBQ & Meal Prep Tub Our best-selling prep tub is built for exactly this kind of cook: mix the stuffing, carve on the built-in cutting board, and stash leftovers under the locking lid. Collapsible sides fold it down for storage, and carry handles take it from counter to grill. Built-in cutting board, locking lid, collapsible sides, carry handles Three sizes: JR (34.99), Original (47.99), XL ($54.99) Four colors: Black, Orange, Forest Green, Sandstone For this recipe: the Original holds a full batch of stuffing for 6–8 peppers Make it your own Tag @bbq_dripez and @viewsncues when you carve your Jack-o-Peppers. We want to see your scariest faces. Need the gear? Shop the Prep Tub and Serve Up™ a Halloween dinner without the cleanup.

How to Brine a Turkey: Wet Brine vs. Dry Brine
Every year, there are Thanksgiving tables all over the country where the unspeakable is spoken out loud, and entire families become hostile towards each other the rest of the day: “The turkey’s a little dry.” But here’s the good news: this is a fixable problem. Brining is the highest-return thing you can do to a turkey to keep it from getting too dry. It takes about fifteen minutes of work, and whether to dry or wet brine comes down to what you care about more, which we’ll sort out in a minute. What is brining a turkey? Brining is when you salt your meat ahead of time so it holds onto its moisture during cooking. Because salt partially unwinds the muscle proteins, they hold water more effectively and contract less when they hit heat, so less juice is squeezed out. Salt also diffuses through the meat over time, which seasons it all the way to the center instead of just coating the outside. So brining isn’t about adding water. It’s about getting the bird to keep the moisture it already has. Wet brine vs. dry brine: what’s the difference? A wet brine is when you dissolve salt in water and submerge the meat, so some liquid moves in alongside the salt. A dry brine rubs salt directly on the surface by pulling the meat's own moisture out, and then that concentrated liquid is reabsorbed over the next day or two. Both work. They just work differently: Wet brine Dry brine What you do Submerge in salt water Rub salt on, refrigerate Salt ratio ~1 cup kosher salt per gallon of water ~½ tsp kosher salt per pound of turkey How long 12–24 hours 24–72 hours Flavor Milder, more diluted Deeper, more concentrated turkey flavor Skin Harder to crisp (wet skin) Crispier (salt pulls moisture off the surface) The short version: go for a wet brine if you want maximum insurance against a dry bird. Dry brine if you want crispier skin and a turkey that tastes more like that classic Thanksgiving turkey. How to wet brine a turkey Spatchcock the bird (optional, but we like it). Take kitchen shears and remove the backbone; press down on the breastbone until it cracks and the bird lies flat. It brines more evenly, it cooks faster, and it actually fits in a container. You can do this directly in your XL Prep Tub. Make the brine. About 1 cup of kosher salt per gallon of water. Bring a portion of the water to a boil with your salt, sugar, and aromatics to dissolve everything, then add the rest cold. Cool it completely. This is non-negotiable. Warm brine on raw poultry puts your turkey straight into the danger zone. Set up your container. A heavy-duty brining bag inside an XL Prep Tub is the setup we use. The bag holds the liquid, the tub contains the bag, and the locking lid means you can move the whole thing to the fridge without rearranging your kitchen. (Not sure which size you need? We broke that down here.) Brine 12 to 24 hours, refrigerated, below 40°F the whole time. Pull it out and pat it dry. Paper towels, inside and out. Don’t rinse it in the sink — that splashes raw poultry bacteria around your kitchen and doesn’t accomplish anything the paper towels won’t. How to dry brine a turkey Spatchcock it in your prep tub (same reasons as above). Measure your salt. About ½ teaspoon of kosher salt per pound of turkey. A 14-pound bird needs roughly 7 teaspoons, or a little over 2 tablespoons. Season everything. Salt the whole surface, including under the skin where you can get to it, and inside the cavity. Add sugar, pepper, or herbs if you want. Refrigerate uncovered for 24 to 72 hours. Uncovered is the point. The air dries the skin out, and dry skin is crispy skin. Don’t rinse it. The salt has already been absorbed. Anything still on the surface is seasoning. Pro tip: Whichever method you use, let the bird sit uncovered in the fridge for the last 12 to 24 hours. That air-drying step is what separates crispy skin from leathery skin, and almost nobody does it. Brining mistakes that ruin a turkey Please note: Check your label before you brine anything. If the turkey is labeled kosher, self-basting, enhanced, or “contains up to X% solution,” it has already been brined at the plant. Brine it again and it will be inedibly salty. Salt type matters more than you think. A cup of table salt and a cup of kosher salt are not the same amount of salt — table salt is much denser, so the same volume is significantly saltier. Every ratio in this post assumes kosher salt. If you’re using table salt, cut the volume by roughly half. Never reuse brine. It’s had raw poultry in it. Dump it. Keep it cold the entire time. Below 40°F, same rule as everything else. We go deeper on the danger zone in our guide to resting meat. Don’t over-brine. More time is not better. A turkey left in a wet brine for two days comes out spongy and too salty to fix. After the brine: season, smoke, rest Once the bird is dry, spray it lightly with avocado oil as a binder and hit it with a simple rub. Something salt-forward is risky here since you’ve already salted the bird, so a lighter hand than usual is the move. For smoking: start around 225°F to get smoke into the meat, then bump the heat to 325–350°F to crisp the skin. Pull it when the thickest part of the breast reads 165°F. Two thermometers is better than one — breast and thigh cook at different rates. Then rest it for 30 to 45 minutes, which feels like forever and is worth every second. A Rest EZ® BBQ Blanket holds it at temperature while you finish the sides, and the cutting board built into your prep tub means you can carve right there and keep all the juice in the tub instead of on the counter. Want a showstopper recipe? Steven Raichlen’s truffle-stuffed smoked turkey is worth a look. Turkey brining FAQ Should I wet brine or dry brine a turkey? Dry brine if you want crispier skin, deeper turkey flavor, and less mess. Wet brine if your main worry is a dry bird and you have the fridge space. Both produce a juicier turkey than no brine at all. How long should I brine a turkey? 12 to 24 hours for a wet brine, 24 to 72 hours for a dry brine. Don’t exceed those windows — over-brining makes the meat spongy and overly salty. How much salt do I need to brine a turkey? About 1 cup of kosher salt per gallon of water for a wet brine, or about ½ teaspoon of kosher salt per pound of turkey for a dry brine. Use kosher salt; table salt is denser and will oversalt the bird at the same volume. Do I rinse the turkey after brining? No. Pat it dry with paper towels. Rinsing raw poultry in the sink spreads bacteria around your kitchen and doesn’t remove meaningful salt. Can you brine a frozen turkey? No. Thaw it completely first. Brine can’t penetrate frozen meat, and a partially frozen bird will cook unevenly. Do I still need to brine if my turkey is already brined? No, and you shouldn’t. Kosher, self-basting, and “enhanced” turkeys were brined at the plant. Brining again makes them too salty to serve. In summary: How to brine a turkey What brining does: salt loosens the muscle fibers so the turkey holds onto its moisture, and seasons the meat all the way through instead of just the surface. Wet brine: about 1 cup kosher salt per gallon of water, 12 to 24 hours. Maximum insurance against dryness, harder to crisp the skin, takes up your whole fridge. Dry brine: about ½ teaspoon kosher salt per pound, 24 to 72 hours. Crispier skin, deeper flavor, barely any mess. The rules that apply to both: kosher salt, not table salt. Keep it under 40°F. Never brine a turkey that’s already been brined. Pat dry, don’t rinse. And let it air-dry uncovered in the fridge for the last 12 to 24 hours if you want skin worth photographing. After the brine: smoke at 225°F, finish at 325–350°F, pull at 165°F, rest for 30 to 45 minutes. Do that and nobody at your table is going to say the turkey’s a little dry.

Smoked Pizza Pull Apart Bread: The Ultimate Tailgate Appetizer
Wings are great. Dip is fine. But if you want the plate that empties first at your next watch party, make this smoked pizza pull apart bread. Think pizza rolls on game day mode: pillowy dough stuffed with mozzarella, pepperoni, and jalapeños, brushed in garlic butter, kissed with smoke, then finished with hot honey and parmesan. It's one of the easiest game day appetizers you can put on a smoker, and it works for adults and kids alike. This recipe comes from our friend Nick "Heatstroke" Keith of @heatstrokesbbq, who prepped the whole thing in his Drip EZ Prep Tub and Secondz containers. Here's how to make it at home, plus a few tips to help you nail it the first time. Prep time: 30 minutes (includes 20-minute rest) · Cook time: about 25–35 minutes · Smoker temp: 350°F · Serves: 8–10 as an appetizer What you'll need for this pizza pull apart bread Filling 1 lb shredded mozzarella 1 pack pepperoni, chopped 1 cup chopped jalapeños 2 tbsp parmesan Dough 1 can refrigerated pizza dough Garlic butter 4 tbsp butter, melted 2 tbsp jarred minced garlic 1 tbsp crushed red pepper 1 tbsp Italian seasoning 1 tsp salt To finish and serve 3 tbsp hot honey 2 tbsp parmesan 1 tbsp crushed red pepper 2 tbsp chopped fresh basil 1 jar pizza sauce, warmed for dipping Gear: smoker or grill set up for indirect heat, a greased baking pan or tray, a Drip EZ BBQ Prep Tub, and Secondz food storage containers. How to make smoked pizza pull apart bread Mix the filling. In a Secondz container, combine the mozzarella, chopped pepperoni, jalapeños, and 2 tbsp parmesan. Stir it together, snap on the lid, and set aside. You'll use most of it inside the dough and save a little for the top. Fire up the smoker. Preheat to 350°F for indirect cooking. A milder wood like cherry, apple, or pecan keeps the smoke from overpowering the cheese. Cut and fill the dough. Roll the pizza dough out on your Prep Tub and cut it into roughly 2-inch squares. Add a small ball of filling to the center of each square, pull the corners up, and pinch them closed. Let it rest. Nestle the dough balls side by side in a greased pan so they touch. That's what makes them pull apart. Let them sit at room temperature for 20 minutes. Brush with garlic butter. Mix the melted butter, garlic, 1 tbsp crushed red pepper, Italian seasoning, and salt. Brush it over the dough balls, scatter the reserved filling on top, and finish with another drizzle of garlic butter. Smoke it. Cook at 350°F until the bread is golden and cooked through and the cheese is bubbling, about 25–35 minutes. Want a deeper brown crust? Slide it under the broiler for a minute or two. Finish and serve. Top with crushed red pepper, a drizzle of hot honey, parmesan, and fresh basil. Serve warm with pizza sauce for dipping. Tips for the best smoker appetizers Prep the night before. Mix the filling and store it in a lidded Secondz container in the fridge. On game day, all you have to do is cut, fill, and smoke. Keep the mess in the tub. Rolling and cutting dough on the Prep Tub keeps flour and cheese off your counter, and it carries straight out to the smoker. Easy cleanup means more time with your crew. Pack it tight. Dough balls that touch in the pan bake into one shareable loaf. Spread them out and you get rolls instead of pull apart bread. Dial the heat. Swap jalapeños for banana peppers, or skip the crushed red pepper in the butter for a kid-friendly batch. Tailgating? Assemble the pan at home, cover it, and cook it on-site on a portable grill set up for indirect heat. Save the leftovers. Store extras in Secondz containers and reheat at 350°F for 5–10 minutes to bring back the crisp. Smoked pizza pull apart bread FAQ Can I make pizza pull apart bread in the oven instead of a smoker? Yes. Bake at 350°F for the same time. You'll lose the smoke flavor, but it's still a crowd-pleaser. What temperature do you smoke pull apart bread at? 350°F. That's hot enough to bake the dough through and melt the cheese, with time to pick up a light smoke flavor. Can I make it ahead for a tailgate? Yes. Mix the filling up to a day ahead and keep it covered in the fridge. Assemble the dough balls the day of so they stay light and fluffy. What else can I cook on a smoker for a game day party? Pull apart bread pairs well with smoked wings, smoked queso, and sliders. Check out more game day recipes from Drip EZ. Prep less mess. Serve up more game day. The best tailgate food ideas are the ones that leave you more time with your people and less time scrubbing counters. The Drip EZ BBQ Prep Tub gives you one place to prep, carry, and clean up. Secondz keeps your fillings and leftovers organized from fridge to fire. Both are backed by our 90-day guarantee. Make this one for kickoff, then tag @bbq_dripez and @heatstrokesbbq so we can see your spread. Serve Up™. Shop Prep Tubs and Secondz →

Party Pulled Pork Board-in-a-Tub: The Only Party Dish You'll Ever Need
Let's be honest: most party setups involve way too many dishes, way too many trips to the car, and at least one container that leaks. This isn't that. Drip EZ ambassador @kandbcooking built something that solves all of it at once — a Party Pulled Pork Board-in-a-Tub that starts as a proofing vessel, becomes a prep station, transforms into a serving board, and travels wherever the party is going. One tub. Zero extra dishes. Maximum crowd reaction. We're talking homemade rosemary focaccia baked into fluffy slider buns, slow-cooked pulled pork that shreds with almost no effort, a build-your-own board loaded with coleslaw, pickles, cheese, pepperoncino, and fresh toppings — all assembled inside the same Drip EZ Prep Tub that started the whole process. Snap the lid. Go to the party. Open it at the tailgate. Watch everyone gather. Proof. Prep. Transport. Serve. One tub does it all. Why the Tub Changes Everything Here's the thing about charcuterie boards and BBQ spreads: they're a logistical nightmare. You're juggling a board, a bag of rolls, a container of meat, another container of toppings, and something always tips over in the car. @kandbcooking solved this with one simple idea: build the whole thing in the Drip EZ Prep Tub — from start to finish. The focaccia dough proofs overnight right in the Junior Prep Tub. The pork preps on a clean surface. The board gets assembled in the Original Prep Tub, which pops up on its sides to create walls that keep everything organized and contained. Snap on the lid and you've got a fully sealed, fully portable party in a tub. No extra containers, no foil, no mess. This works for tailgates, FIFA watch parties, backyard BBQs, potlucks, family dinners, or any situation where you want to show up with something that makes people immediately say: okay, what is this? What You'll Need For the Focaccia • 4 cups all-purpose flour • 2 tsp @DiamondCrystalSalt kosher salt • 2 tsp instant yeast • 2 cups warm (not hot) water • 2 tbsp @DoniaFarms sea salt butter • 3 tbsp olive oil • 1 tbsp dried rosemary • 2 tbsp @MaldonSalt flaky sea salt • Pepper For the Pulled Pork • 2 lbs pork tenderloins, silver skin removed • 2 tsp smoked paprika • 2 tsp onion powder • 2 tsp granulated garlic • 1 tsp @DiamondCrystalSalt kosher salt • ¼ cup @SBRbbq No Sugar Added Original BBQ sauce • A few drops of liquid smoke (optional) To Assemble the Board • Rosemary focaccia slider buns (from above) • Pulled pork (from above) • 10–12 pepperoncino • 1 bagged coleslaw kit • Watermelon skewers • 6 slices of marble cheese, quartered • ½ a red onion, sliced • ½ a jar of dill pickle slices 🛠 Drip EZ Gear Used in This Recipe BBQ Prep Tub (Junior) — for proofing the focaccia dough overnight. Airtight lid keeps the dough from drying out. BBQ Prep Tub (Original) — the serving vessel itself. Pop up the sides, load the board, snap on the lid, and travel. Secondz® Container — for storing and transporting the pulled pork ahead of time. Keeps it sealed and fresh. How to Make It Step 1: Make the Focaccia Dough (Night Before) In your Drip EZ Junior Prep Tub, whisk together the flour, salt, and yeast. Add the warm water and mix until a sticky dough forms. Drizzle with a little olive oil, cover, and refrigerate overnight. This is where the flavor builds — don't rush it with a same-day proof if you can avoid it. The cold, slow fermentation makes the focaccia taste like something from an actual bakery. Step 2: Bake the Focaccia The next day, grease a 9x13-inch baking dish with butter and add 1 tbsp olive oil. Using two forks, gently pull the edges of the dough into the center several times to form a smooth ball. Transfer to the prepared dish and roll in the oil to coat. Let rise, uncovered, in a warm place for 3–4 hours — or until doubled in size. Preheat your oven to 425°F. Drizzle the remaining oil over the dough and, using your fingertips, create dimples across the surface. Sprinkle with flaky salt, rosemary, and pepper. Bake for 25 minutes until golden brown. Remove from the oven and cool completely. Cut into 2-inch squares and slice each square in half horizontally to create your slider buns. They're fluffy, have that crispy bottom, and hold up to pulled pork without going soggy. Step 3: Make the Pulled Pork Lightly spray an instant pot or slow cooker insert with non-stick spray. Add the pork and season evenly with the paprika, onion powder, garlic, and salt. Top with BBQ sauce and liquid smoke, if using. Cook on low for 3–4 hours, or until the pork easily shreds with a fork. Shred the pork and toss it back in the cooking juices. Don't drain them. The juices are flavor and moisture, and the pork soaks them back up beautifully. For storing or transporting the pork ahead of time, your Secondz® container keeps it sealed and fresh without any drying out. Step 4: Assemble the Board Pop up the sides of your Drip EZ Original Prep Tub and fill it with everything: • Focaccia slider buns • Pulled pork (piled or in its own section) • 10–12 pepperoncino • Coleslaw kit, prepared • Watermelon skewers • Marble cheese, quartered • Red onion, sliced • Dill pickle slices Let everyone build their own sliders. Load a bun, pile on the pork, hit it with coleslaw and pickles, add a slice of cheese — done. The setup takes care of itself and you actually get to enjoy the party. Snap the lid on the tub for transport and remove it right when you're ready to serve. Everything stays contained, nothing shifts around, and arriving with this setup makes an impression before anyone even takes a bite. BBQ Tips for the Perfect Pulled Pork Board BBQ Tips for the Perfect Pulled Pork Board • Use the Junior Prep Tub for dough proofing, Original for serving. The Junior size is perfect for the focaccia dough overnight — it fits, it seals, and keeps the dough from drying out. • Don't rush the focaccia proof. The overnight cold proof is where the flavor develops. A warm same-day proof works, but the overnight version tastes noticeably better. • Pull the pork while it's warm. Right after cooking is when it shreds easiest. Two forks or your hands — it should fall apart with almost no effort. • Toss the pulled pork in the cooking juices. Don't drain them. Toss the shredded pork back in and let it soak everything back up. Juicy, flavorful pork every time. • Build the board right before serving. Assemble in the Prep Tub, snap the lid, and travel. Crispy elements like coleslaw can go in last-minute to stay fresh. • Slice the focaccia squares in half for slider buns. 2-inch squares sliced horizontally are the perfect size — fluffy, sturdy, and they hold up to pulled pork without going soggy. Serving Ideas • The centerpiece of a backyard BBQ, tailgate, or watch party — set it out and step back • A potluck contribution that actually feeds a crowd without multiple containers • A game day spread where everyone builds their own sliders throughout the game • A make-ahead family dinner — the pork keeps beautifully in Secondz® overnight • A summer cookout board alongside grilled corn, pasta salad, and watermelon If you've been showing up to parties with a store-bought rotisserie chicken and a bag of rolls, this is your upgrade. @kandbcooking's Party Pulled Pork Board-in-a-Tub is the kind of recipe that becomes your thing — the dish people start requesting by name. The homemade focaccia alone is enough to make it legendary, and the fact that the whole build lives in one tub that snaps shut and travels anywhere? That's just Drip EZ doing what Drip EZ does. One tub. Zero excuses. Serve Up. 🔥

Thai Larb Recipe: The Ultimate Healthy Meal Prep You'll Actually Crave
Meal prep gets a bad reputation for being boring. The same chicken and rice, the same bland containers, the same resigned Tuesday lunch. This Thai Larb from Drip EZ ambassador @heatstrokesbbq (Nick Keith) is the antidote to all of that. It's bright, punchy, herb-forward, and loaded with bold Southeast Asian flavor — and when you wrap it in a butter lettuce cup and hit it with hot sauce, it's genuinely one of the best bites you'll have all week. The best part? You swap the ground meat every time you make it, so it never gets old. Ground pork this week, chicken next week, lamb the week after. Same recipe, completely different flavor profile. That's smart meal prep. What Is Larb? Larb (also spelled laab or laap) is a traditional minced meat salad from Laos and Northern Thailand. It's considered the national dish of Laos and a staple of Thai cuisine in the northern regions. Unlike heavy Western meat dishes, larb is all about brightness — lime juice, fish sauce, fresh herbs, and the unique nuttiness of toasted rice powder that ties everything together. It's light enough to eat for lunch every day of the week and bold enough that you'll actually look forward to it. Why Toasted Rice Powder Is the Secret Weapon If you've never made toasted rice powder, this is your introduction to one of the most underrated ingredients in Southeast Asian cooking. It's made by dry-toasting raw jasmine rice in a pan until golden, then grinding it into a coarse powder. What it does in this dish is irreplaceable — it adds a subtle nuttiness, a gentle crunch, and a thickening quality that pulls all the flavors together and gives the larb its characteristic texture. Don't skip it and don't substitute breadcrumbs. Just make it. It takes five minutes. To make toasted rice powder: Add 3 tbsp raw jasmine rice to a dry pan over medium heat. Toast, stirring frequently, until deep golden and nutty-smelling, about 5–7 minutes. Let cool, then grind in a spice grinder or mortar and pestle to a coarse powder. Ingredients 1 lb ground pork, chicken, beef, or lamb 2 tbsp lime juice (fresh is best) 2 tbsp fish sauce 1 tsp sugar or sweetener 3 Thai chilis, thinly sliced 2 tbsp toasted rice powder 2 shallots, thinly sliced ½ cup chopped cilantro ¼ cup Thai basil ¼ cup chopped mint For serving: Butter lettuce or romaine leaves Hot sauce (Melinda's Sriracha recommended) Sliced cucumber and extra lime wedges Instructions 1. Prep Everything Before You Cook Larb comes together fast once the meat hits the pan, so get all your herbs chopped, shallots sliced, chilis cut, and lime juiced before you turn on the heat. Use your Drip EZ Prep Tub to keep all your prepped ingredients organized and contained — it's especially handy when you're working with fresh herbs that like to scatter everywhere. 2. Cook the Meat Add your ground meat and a splash of water to a pan over medium heat. Break it up as it cooks, stirring until just cooked through with no browning — you want the meat tender and lightly steamed, not caramelized. The water helps keep it moist and prevents the outside from crisping up before the inside is done. As soon as it's just cooked, turn off the heat. 3. Season While Hot With the heat off, immediately add the lime juice, fish sauce, sugar, sliced shallots, and Thai chilis directly to the pan. The residual heat will soften the shallots slightly and help the flavors absorb into the meat without cooking the herbs that come next. Mix well and taste. Adjust the lime or fish sauce to your preference — more lime for brightness, more fish sauce for depth and saltiness. 4. Fold In the Herbs and Rice Powder Add the cilantro, Thai basil, and mint to the pan. Fold them in gently — you want them to wilt just slightly from the residual warmth, not cook down completely. Finally, add the toasted rice powder and fold it through. This is the step that transforms it from seasoned ground meat into something that actually tastes like authentic larb. 5. Pack for Meal Prep This is where the Drip EZ Secondz containers earn their place. The airtight, leakproof lids mean you can pack multiple portions without worrying about fish sauce or lime juice making a mess in your fridge or bag. The containers are sized right for individual meal prep servings, and they snap flat for storage when you're done. Portion out your larb and refrigerate. It keeps well for 3–4 days and actually tastes better on day two once the flavors have had time to meld. How to Serve It The classic move: lettuce wraps. Spoon the larb into butter lettuce or romaine cups, top with a drizzle of Melinda's Sriracha, and add a squeeze of fresh lime. That's the bite Nick is talking about — and once you have it, you'll understand the hype. Other great ways to serve: Over steamed jasmine rice for a more filling meal Stuffed into rice paper rolls with cucumber and vermicelli Served alongside sliced cucumber and raw cabbage for scooping Topped with crispy shallots and extra Thai basil for a restaurant-worthy presentation On a grain bowl base with quinoa, shredded cabbage, and a lime-sesame dressing The Meat Swap Strategy — Why This Recipe Never Gets Old One of the smartest things about this recipe is the flexibility built right into it. The base — lime, fish sauce, herbs, toasted rice powder — works with virtually any ground protein. Here's how the flavor shifts with each swap: Ground pork — Rich, fatty, traditional. The classic larb base. Ground chicken — Lighter and leaner, lets the herbs shine through. Ground beef — Bolder and meatier, almost like a Southeast Asian take on a taco filling. Ground lamb — The most adventurous option, with a gamey depth that pairs beautifully with the mint. Make a different version each week and your meal prep stays exciting for a month straight. BBQ Tips & Meal Prep Notes No browning on the meat. This is key. Larb is a wet-heat dish — you want tender, moist meat, not a sear. The water in the pan helps achieve this. Fresh herbs, not dried. The cilantro, Thai basil, and mint are doing heavy lifting here. Dried herbs won't cut it. Make extra toasted rice powder and keep it in a jar. It stays good for weeks and you'll find yourself adding it to other dishes. Secondz containers are perfect for this cook. The lime juice and fish sauce don't leak, the lids seal tight, and they collapse flat when empty — no wasted cabinet space. Meal prep 4 portions at once. Double the recipe, portion into four Secondz containers, and you've got lunch sorted for the week in under 30 minutes. Whether you're chasing your New Year's goals, trying to eat cleaner without giving up on flavor, or just tired of sad desk lunches — this Thai Larb from @heatstrokesbbq is the answer. Bold, bright, fresh, and ready in 20 minutes. That's how we Serve Up. 🔥

Candied Sriracha Bacon Recipe
If you’re looking for the ultimate sweet-heat appetizer, this Candied Sriracha Bacon recipe delivers everything you want in one bite. Created by @tfti.bbq and @heatstrokesbbq, this recipe combines crispy bacon with a bold, sticky glaze for that perfect balance of sweet and spicy bacon.

Cherry Coke Pulled Pork Recipe
If you’re looking for a crowd-pleasing, flavor-packed BBQ pulled pork recipe that practically cooks itself, this Cherry Coke Pulled Pork is about to become your new favorite. Created by @svenddiesel, this dish combines the rich, smoky goodness of slow cooker pulled pork BBQ with the sweet, caramelized magic of cherry cola. The result? Tender, juicy, sweet and smoky pulled pork that melts in your mouth with every bite—perfect for backyard BBQs, game day gatherings, or easy weeknight dinners. Why Cherry Coke Works So Well It might sound unusual, but using Cherry Coke in this pork shoulder BBQ recipe is a game-changer. As the pork cooks low and slow, the sugars in the soda caramelize and help create a sweet, tangy depth of flavor while keeping the meat incredibly moist and tender. The acidity and carbonation also help break down the meat fibers, making this one of the best pulled pork recipes for effortless shredding. Ingredients 4–5 lb pork shoulder (or pork butt) 1 can (12 oz) Cherry Coke 1 cup barbecue sauce (your favorite BBQ sauce) ¼ cup brown sugar 1 tbsp garlic powder 1 tbsp onion powder 1 tbsp salt 1 tsp black pepper 1–2 tsp liquid smoke (optional, but recommended) Instructions 1. Prep the Pork Pat the pork shoulder dry and place it in a prep tub for easy seasoning and cleanup—especially helpful for BBQ meal prep ideas and keeping your workspace clean. In a small bowl, mix together the brown sugar, garlic powder, onion powder, salt, and pepper. Rub this mixture all over the pork. 2. Add the Flavor Pour the Cherry Coke around the pork, then drizzle the barbecue sauce over the top to build that classic homemade BBQ pulled pork flavor. 3. Slow Cook Cover and cook: Low: 8–10 hours High: 5–6 hours This low-and-slow method is key for achieving tender low and slow BBQ pork. If you're cooking outdoors or using a smoker, maintaining temperature is crucial. Using our Rest EZ® BBQ Blanket helps stabilize heat and is a must-have tool for consistent smoker pulled pork recipes. 4. Shred and Soak Remove the pork and let it rest for about 10–15 minutes. Then shred it using two forks or our BBQ Meat Claws. Return the shredded pork to the slow cooker and toss it in the juices for maximum flavor—this step locks in that rich, easy BBQ recipe taste. 5. Serve Pile the pulled pork onto buns, tacos, nachos, or enjoy it straight from the plate. It’s a versatile favorite for BBQ party food ideas and casual family meals alike. BBQ Tips for Perfect Pulled Pork Use pork shoulder or pork butt for authentic Southern-style BBQ pulled pork Maintain consistent heat for the best smoked pulled pork texture Use a Rest EZ® BBQ Blanket to regulate temperature in grills or smokers Use heat-resistant grill mitts when handling hot meat or cookware for safer cooking Let the meat rest before shredding for juicy, flavorful results Add extra BBQ sauce at the end for bold, sticky goodness Serving Ideas This dish fits right into all your backyard BBQ ideas and gatherings: Classic BBQ pulled pork sandwiches with coleslaw Pulled pork sliders for parties and game day BBQ recipes BBQ nachos or loaded fries Smoked pulled pork tacos or burrito bowls Southern-style BBQ plates with baked beans and cornbread This Cherry Coke Pulled Pork recipe delivers everything you want in a pork shoulder BBQ recipe—it’s easy, flavorful, and perfect for any occasion. Whether you’re making it in a slow cooker or adapting it for a smoker, it’s one of those easy BBQ recipes you’ll come back to again and again. With the right tools and techniques, you can turn a simple cut of pork into a standout homemade BBQ pulled pork dish that’s guaranteed to impress.

Surf n’ Turf Cajun Fajitas Recipe
Steak meets shrimp in these bold Cajun Surf n’ Turf Fajitas, loaded with grilled veggies and finished with a creamy lime sauce. Big flavor, simple prep, and perfect for the grill.

Grab & Go Sheet Pan Protein Pancakes Recipe
Bake once, slice, and build four different protein-packed pancake boxes for the week. This easy sheet pan recipe saves time, reduces dishes, and keeps mornings stress-free.